Hi Guys,
I hope you're all well and enjoying you week!
It's
Kylie here for another Tropical Tuesday instalment and today I'm going back to basics with my all time favourite technique...Heat Embossing!
***Warning...Raving Below***
When I was a little girl(many, many moons ago lol)Mum and Dad gave me a card for my Birthday and the images and sentiments were all black and glossy and I fell in love with it(I still have that card today) and as I grew older and brought cards(gasp lol)for family and friends I always went for those shiny glossy black images lol!
I was finishing my last year in high school and I was going to backpack around Europe with friends but things happened and we had to call off our trip and I didn't want to go to Uni(much to mum and dad's disgust roflol)so I got a full time job in a...you guessed it a Card Shop lol and there I was surrounded by all those gorgeous cards with the black glossy images from card companies like Hallmark, John Sands, Biscay etc and I was spending my wage on cards(OK, clothes and shoes too lol)so I went to a card making class and I was hooked and that's how I got into making my own cards and discovered Heat Embossing, just like I saw on all those cards!
So today I thought I'll share with you my love for heat embossing lol!
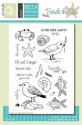
To start off I stamped my poppy image from the newly released
'Remember When' stamp set in white ink(I wanted to have a shadow effect with the poppy image)and wait for it to dry.
Once dried, I used my embossing buddy and covered the whole front of my cardstock panel! I always use an embossing buddy when I heat emboss as it removes static from the cardstock, eliminates moisture and helps the powder stick to the ink!
I then stamp my image using Versamark ink or you could use any embossing ink you have in your stash
Now for the fun part...
Pour you embossing powder(here I have used
ABS Ebony)onto your inked image, making sure that your image is completely coated in the powder
Shake off the excess powder and return back into the container
Using a heat gun, heat the powder by slowly moving the gun over the image, a little at a time until the powder melts and you are left with a glossy raised finish and allow your image to cool!
Use your embossed image on your project!
Here's my finished card:
My poppy is an outline image but embossing also looks Awesome with a solid image...
For my tag I used
ABS White Opaque embossing powder and it looks Awesome on a dark coloured cardstock, love this look!
Supplies Used:
AnnaBelle Stamps:
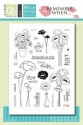
~
Remember When Stamp Set
~
Ebony Embossing Powder
~
Black Twine
~
White Opaque Embossing Powder
Other:
~Black and Kraft Cardstock
~Black Tag
~White Ribbon
~Tag Punch
~Silver Butterfly charm
Embossing powder comes in a huge variety of colours and you can also get glittery ones too!
Here's a few hints and tips I have learnt along the way...
~Prepare your cardstock using an embossing buddy if you have done this and have splatters of power on your cardstock, use a fine paintbrush to remove the excess power.
~Pre-heat your heat gun and used the back end of a pen etc to hold your cardstock in place and be careful when using a heat gun as it can get mighty hot(I have to scares to prove it roflol)
~Take care not to over heat the powder by getting too close as you can 'burn' the powder and loose the gorgeous glossy shine to it
~unfortunately you can not use a hair dryer to heat emboss as the hair dryer can't reach the desire temperature and will scatter your powder everywhere(I've tried this lol)
~If you want to heat emboss and don't have a heat gun, try your toaster! This is what I used when I didn't have a heat gun, just put your toaster to it's lowest setting, pull the leaver down and carefully hold your panel above the slots(while there, kill two birds with one stone and make some toast roflol)and the heat will melt your powder
~Once you finished embossing allow your project to cool before use to avoid smearing
~If your cardstock warps after embossing, try heating the opposite side with your heat gun to reverse the warping
I hope this has been helpful and once you start embossing you'll be hooked lol!
Thanks so much for joining me, till next time, Take Care and Keep Smiling,
Hugs,
Kylie X